The Alien franchise contains many hidden maps, holographic displays, navigation charts and engineering schematics scattered across the films. These visuals help explain how ships navigate space, where important planets are located, and how major installations like Hadley's Hope or the Atmosphere Processor are structured. Some of these maps appear only briefly on screens, while others are shown as large holographic projections used by the characters. This article collects the most important maps from the Alien universe, including star system charts, colony layouts, alien facility maps and spacecraft schematics from across the movies. The Yautja side has its own counterpart in our Predator universe maps guide.
Table Of Contents
Maps From Alien
The original 1979 movie introduced the first navigational maps of the Alien universe. Most of them appeared on retro-style CRT monitors aboard the USCSS Nostromo as the crew approached the remote moon LV-426. These displays showed orbital calculations, terrain scans and navigation paths as the ship entered the Zeta Reticuli star system.
LV-426 Star System Map

This star system display appeared on the Nostromo's navigation monitors while the crew investigated a mysterious transmission. The map showed the position of the gas giant Calpamos and its moon LV-426 within the Zeta Reticuli system. These types of charts helped the Nostromo plot a safe approach vector toward the moon. As Lambert famously said "It's not our system", indicating it's not our star system, and far from it.
LV-426 Orbit Insertion Map
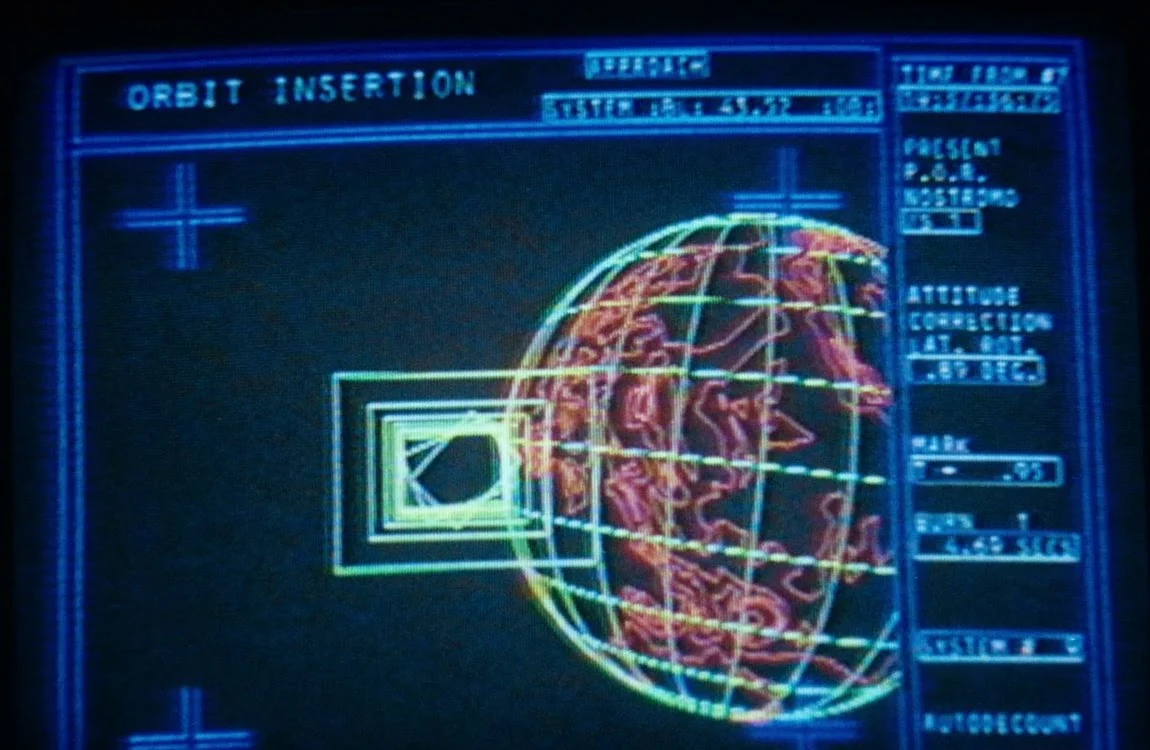
Before landing on the moon, the Nostromo computer plotted an orbital insertion trajectory. This screen visualized the flight path required for the landing craft to descend safely toward the moon's surface. The display included gravitational vectors, descent timing and orbital calculations. After detaching from the giant refinery, the USCSS Nostromo took the green "corridor" displayed on the screen to reach the surface.
LV-426 Surface Map
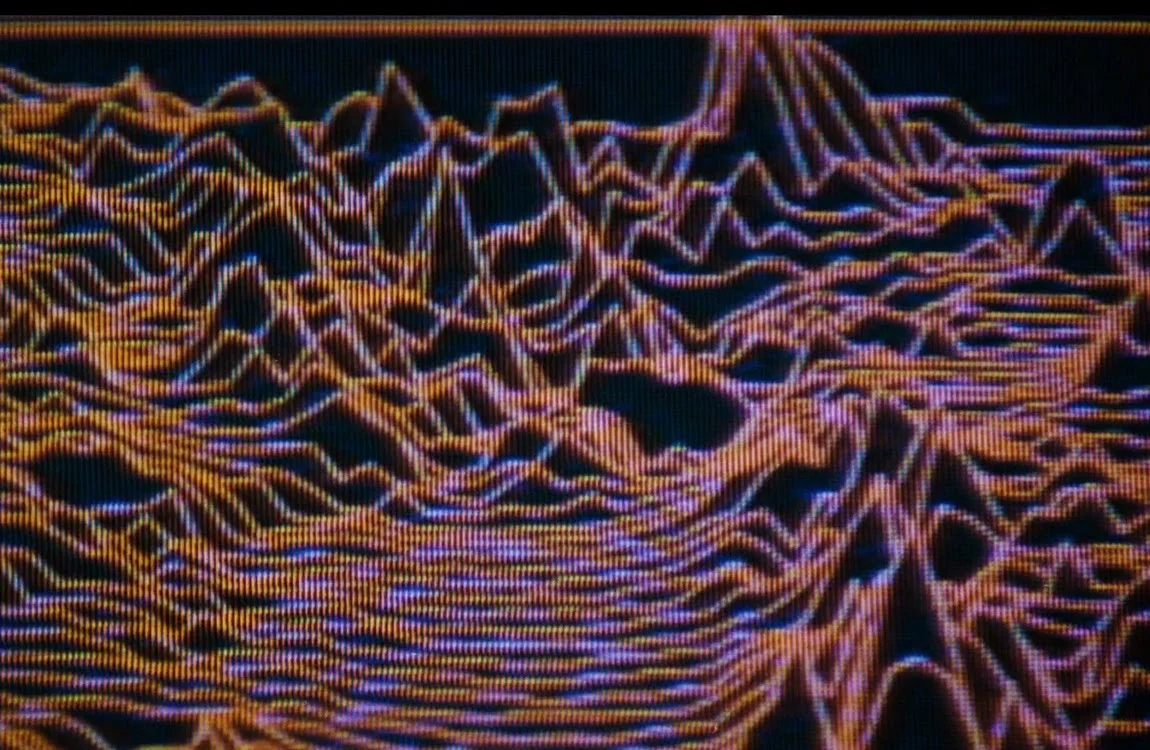
Surface scans of LV-426 appeared on Nostromo monitors while the crew explored the moon. These displays visualized the terrain around the derelict Engineer spacecraft discovered by Kane, Dallas, and Lambert. They helped the crew track the landing party and monitor environmental conditions on the hostile world. Unfortunately, the terrain map does not show the derelict ship itself, but it was about 2000 meters from the Nostromo's landing site. The mountains displayed could be the Ilium Range mentioned in Aliens.
Maps From Aliens
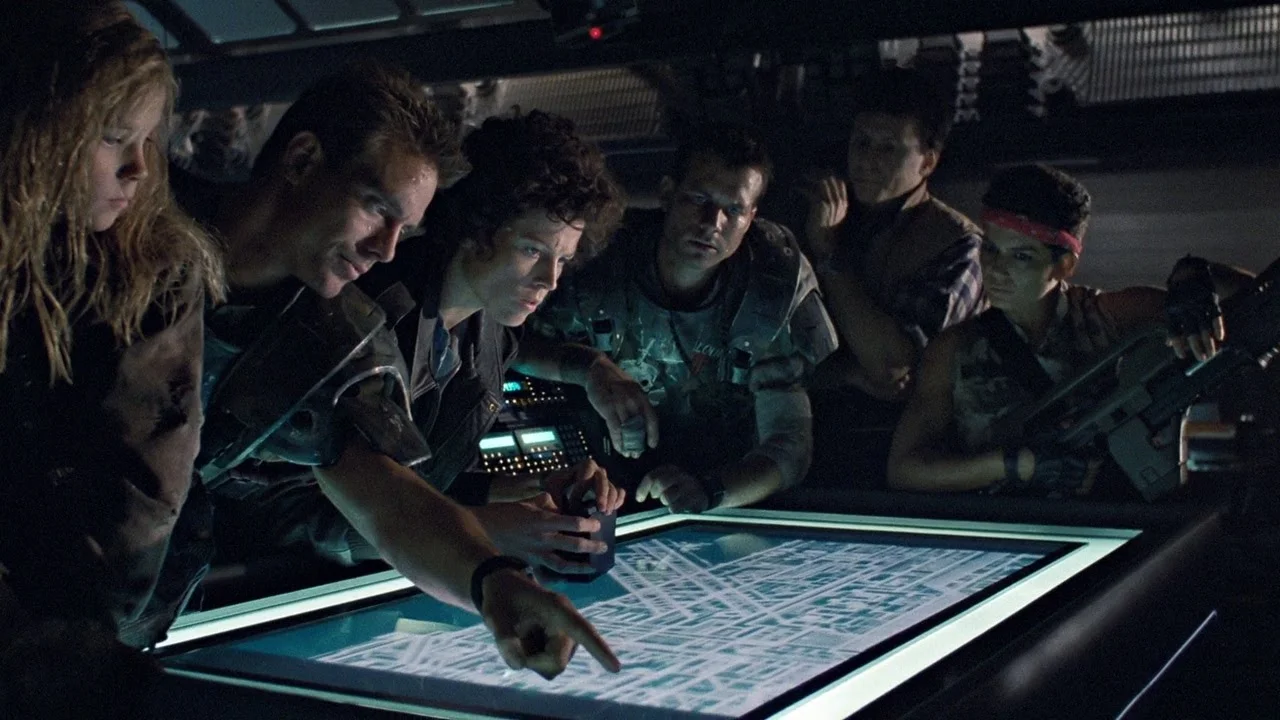
Aliens expanded the use of schematics and tactical maps. The Colonial Marines relied heavily on detailed facility layouts and atmospheric processor diagrams while fighting the Xenomorph outbreak at Hadley's Hope. These schematics became essential for understanding the colony infrastructure. In addition, the tactical displays on the Colonial Marines APC provided more information and integrated with the colony maps.
Atmosphere Processor Schematic
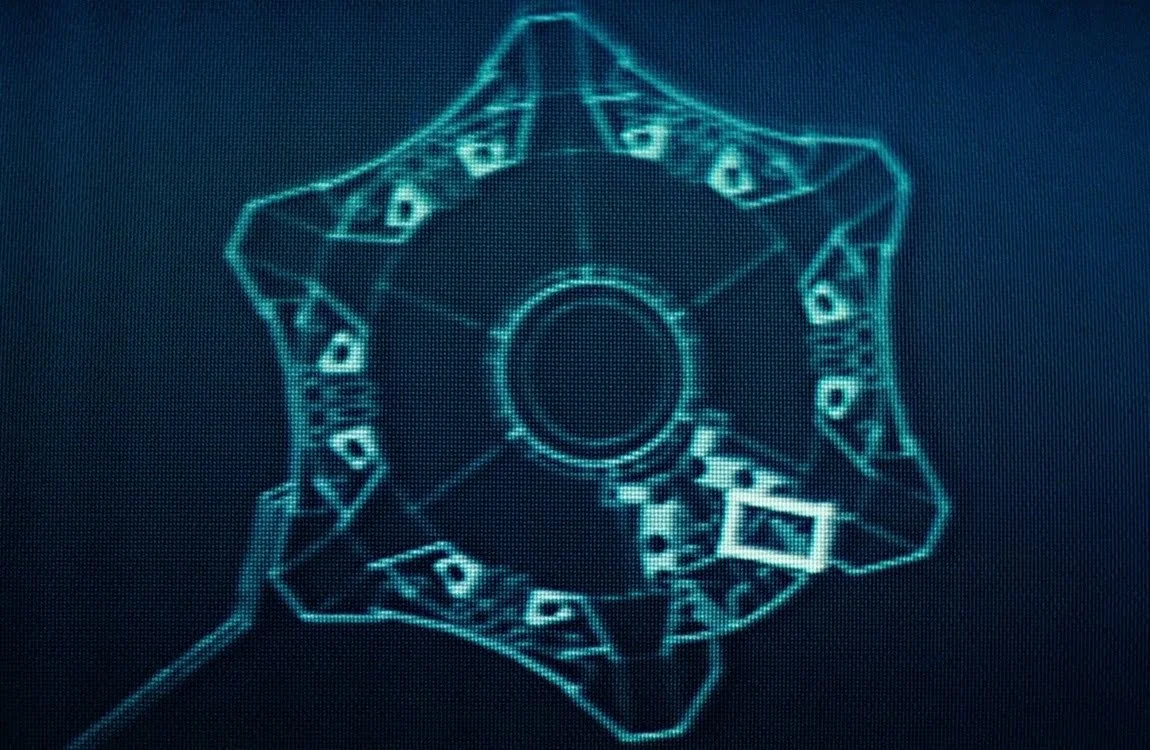
The Atmosphere Processor converted LV-426's hostile atmosphere into breathable air for the colony. This schematic illustrated the massive industrial complex that dominated the colony landscape. The facility became the location of the Alien hive where the Xenomorphs brought all the 158 colonists (yes, even including Newt, who was brought in later). The colonists were visible with their Personal Data Transmitters, which worked even when the colonists were dead. On the left side is the tunnel the Xenomorphs used to move the colonists.
Primary Heat Exchanger Top-Down Schematic
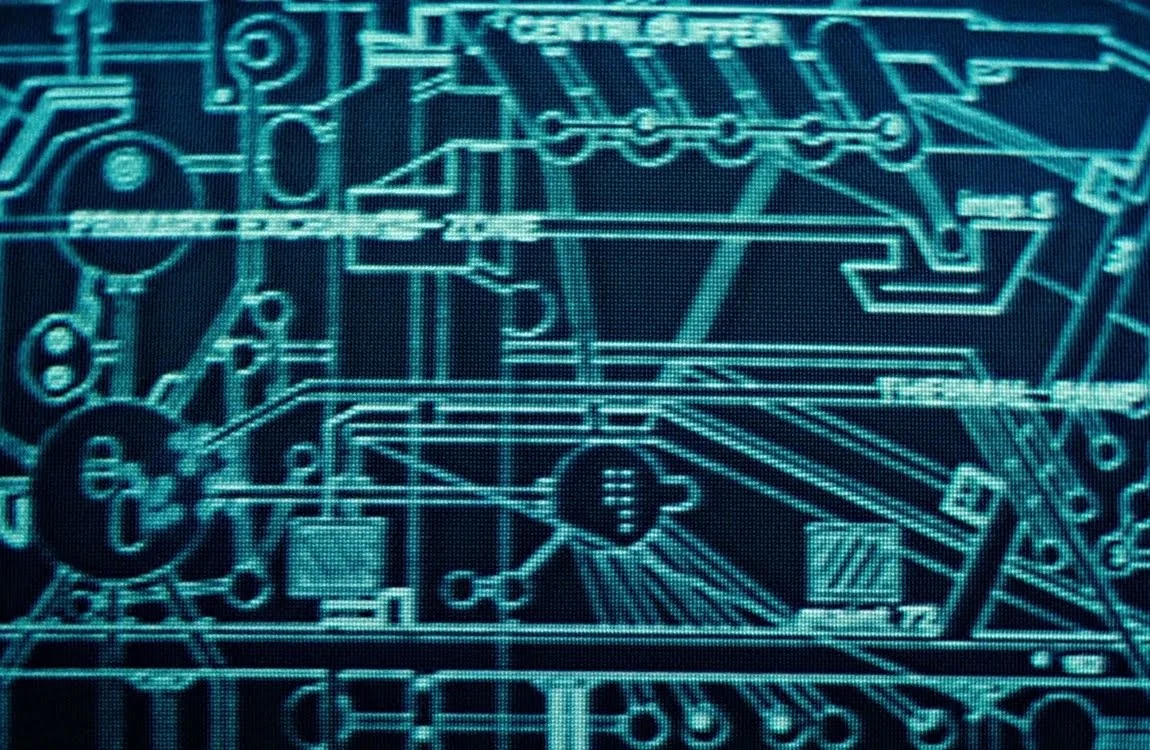
On the bigger Atmosphere Processor diagram, this lower area was the "busiest". The primary heat exchanger controlled the enormous thermal output of the Atmosphere Processor. This top-down engineering diagram showed the arrangement of pipes, turbines and cooling systems within the facility. Damage to these components eventually caused the catastrophic explosion near the end of the movie. Visible labels on the diagram include "Central Buffer", "Primary Exchange Zone", and "Thermal Ramp".
Primary Heat Exchanger Elevation View
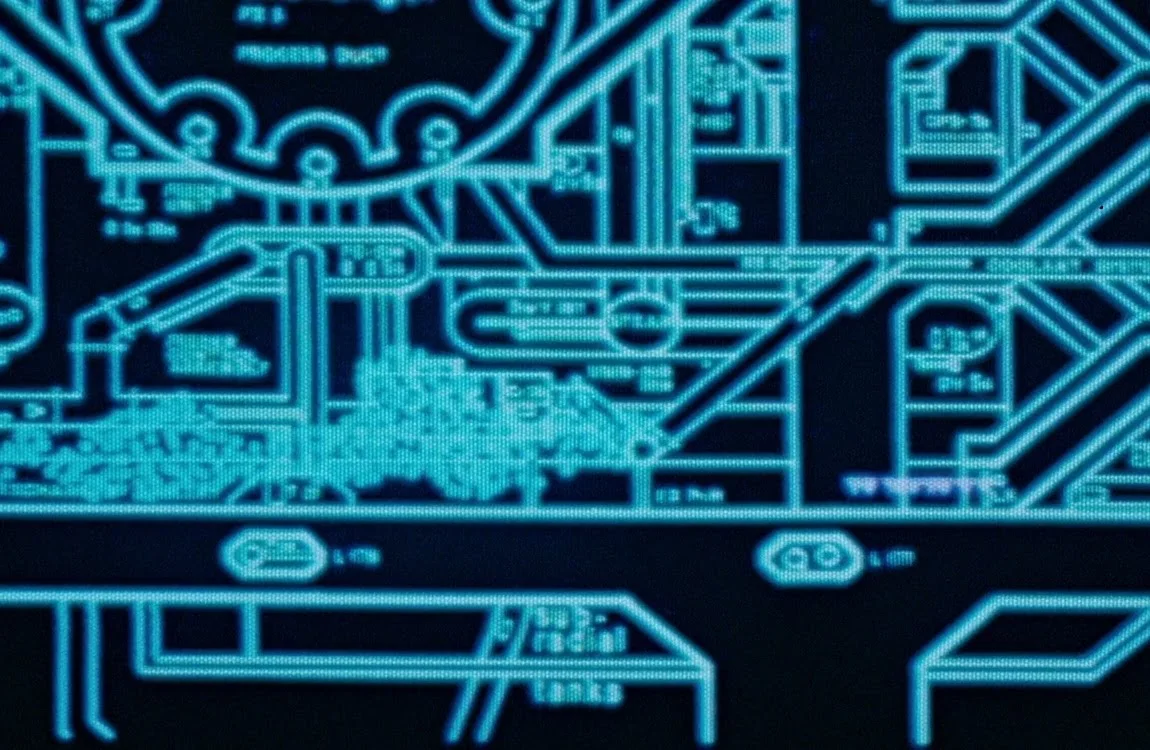
Another schematic displayed the heat exchanger in elevation view. This version illustrated the vertical layout of the reactor complex, including energy conduits and cooling arrays. These diagrams highlighted how massive the facility actually was compared to the nearby colony. This diagram was visible in the Colonial Marine APC, and must have been pulled from the Hadley's Hope colony memory banks. It indicated the marines descending from the stairs on the right to sub level three, and moving closer to the cluster of colonist PDTs. The diagram indicates an even deeper level labeled "sub radial tanks", which is perhaps where PFC Frost fell while burning.
Hadley's Hope Floorplan
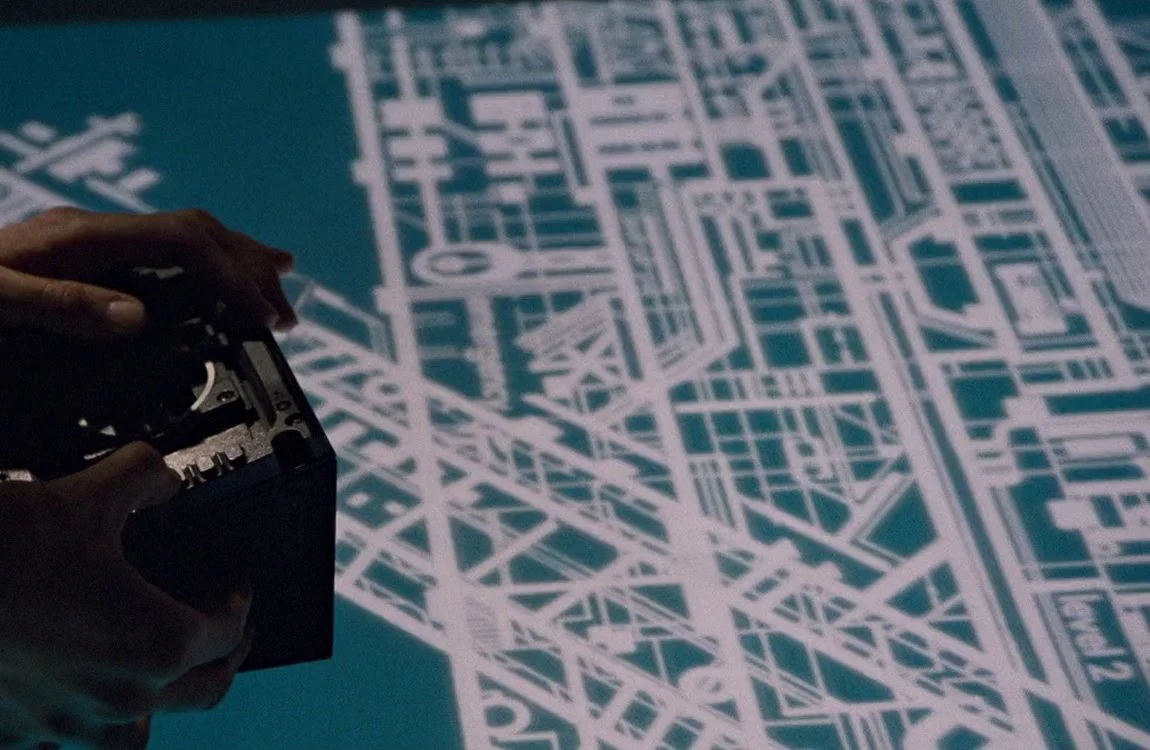
The Hadley's Hope floorplan displayed the layout of the terraforming colony, however it was quite difficult to read. It was pulled by PFC Hudson from the colony memory banks in the Operations complex. It included residential blocks, laboratories, tunnels, and industrial structures connected by internal corridors. This map helped the marines plan their defense of the complex, but somehow they missed the air ducts and the ceiling panels.
Hadley's Hope Operations Floorplan
The operations center served as the control hub for the colony. From here the colonists monitored atmospheric processing, power generation and communications with orbiting spacecraft. During the outbreak it became one of the final defensive positions against the Xenomorph swarm. Again, the floor layout is confusing, but it indicates the tunnel where the two sentry guns are placed, which is connected to the Atmosphere Processor.
Maps From Alien 3
Alien 3 took place on Fiorina (Fury) 161, a remote penal colony run by the Weyland-Yutani Corporation. The complex was extensive, spanning nearly ten square miles, and had several ventilation ducts that played a crucial role during the Xenomorph incident.
Fury 161 Prison Map
The movie contained only one visible map, printed on an old sheet of paper, and investigated by Ellen Ripley and prison guard Francis Aaron (nicknamed 85). The Fury 161 prison complex revealed the maze-like corridors, furnaces and industrial tunnels that made up the facility. These cramped passages played a major role during the prisoners' desperate attempt to trap the Alien. Note the narrow and irregular maze-like tunnels on the right, perhaps dug under the beach.
Maps From Prometheus
Prometheus introduced large holographic star maps and "scanned" location maps that expanded the scale of the Alien universe. These visuals connected humanity to the mysterious Engineer civilization and revealed potential origins of humanity itself. However, since Prometheus took place decades before Alien, advanced holographic displays looked somewhat out of place.
Prometheus Cave Map
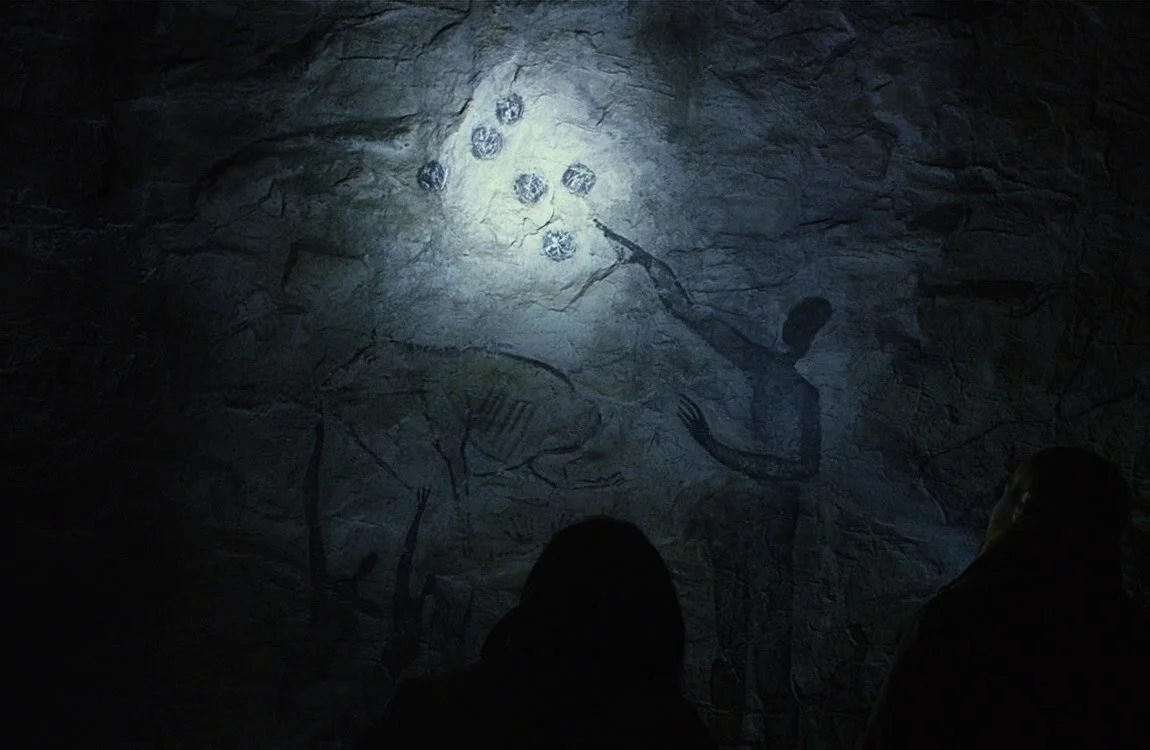
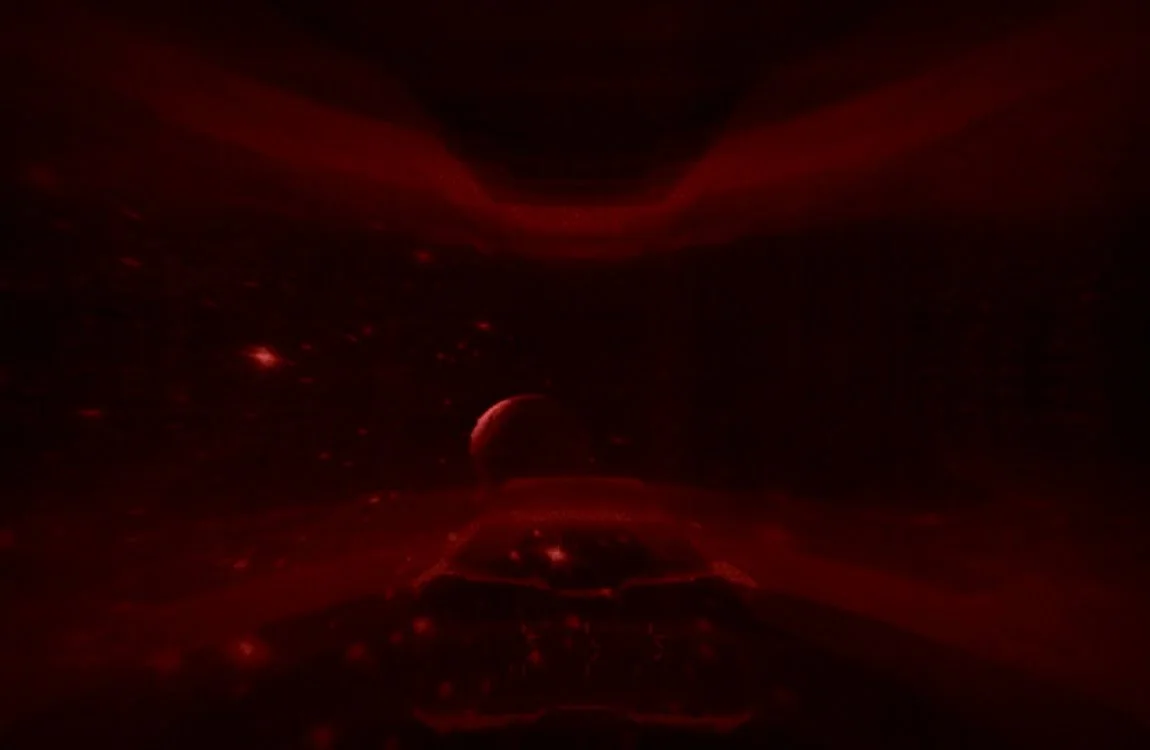
The first map we saw in Prometheus was actually a simple cave drawing, supposedly created 35 000 years ago on the Isle of Skye in Scotland. Similar drawings were found elsewhere on Earth, depicting the Zeta Reticuli system, which is 39 light years from Earth. The drawing does not depict the planetoids LV-223 and LV-426, but instead the planets around the sun in the Zeta Reticuli, one of which is Calpamos.
LV-223 Planetary Map
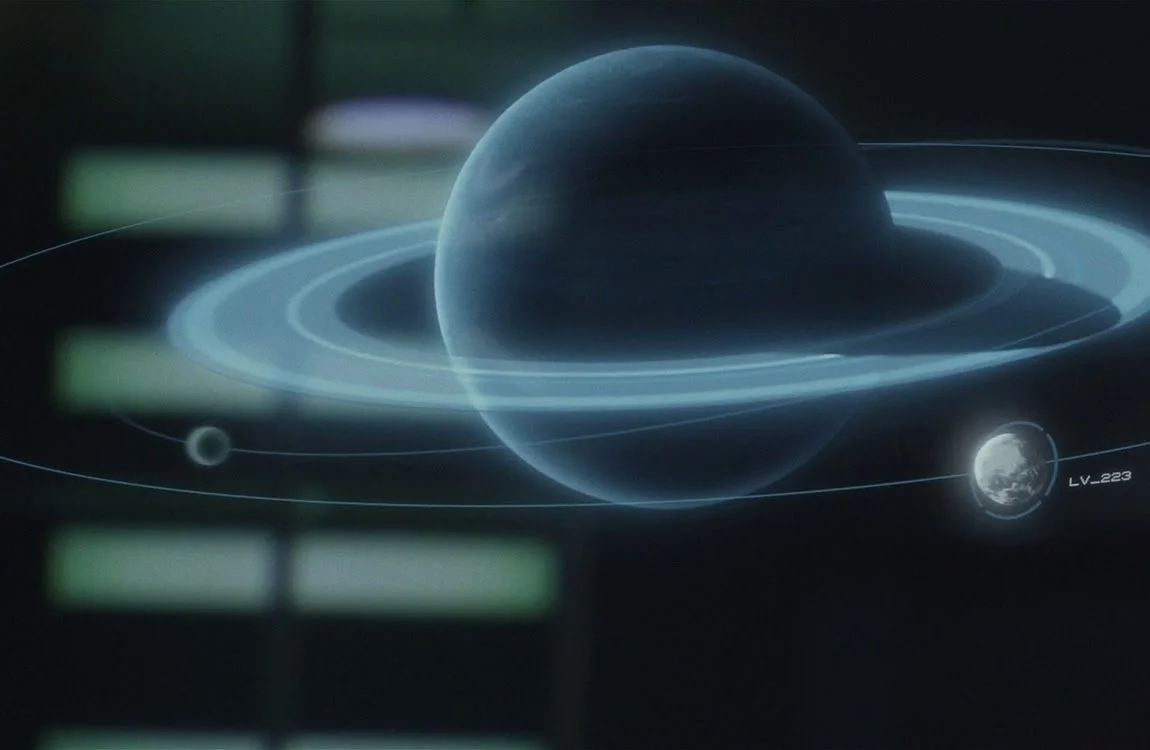
A more detailed planetary map is shown later in the briefing scene on board the USCSS Prometheus after the crew wakes up. It showed the LV-223 moon orbiting the planet Calpamos, one of the six planets seen on the cave painting. Although LV-426 is not indicated on the planetary map, it is most likely one of the other moons. This star system map helped the Prometheus plot its course toward the mysterious moon believed to sustain life.
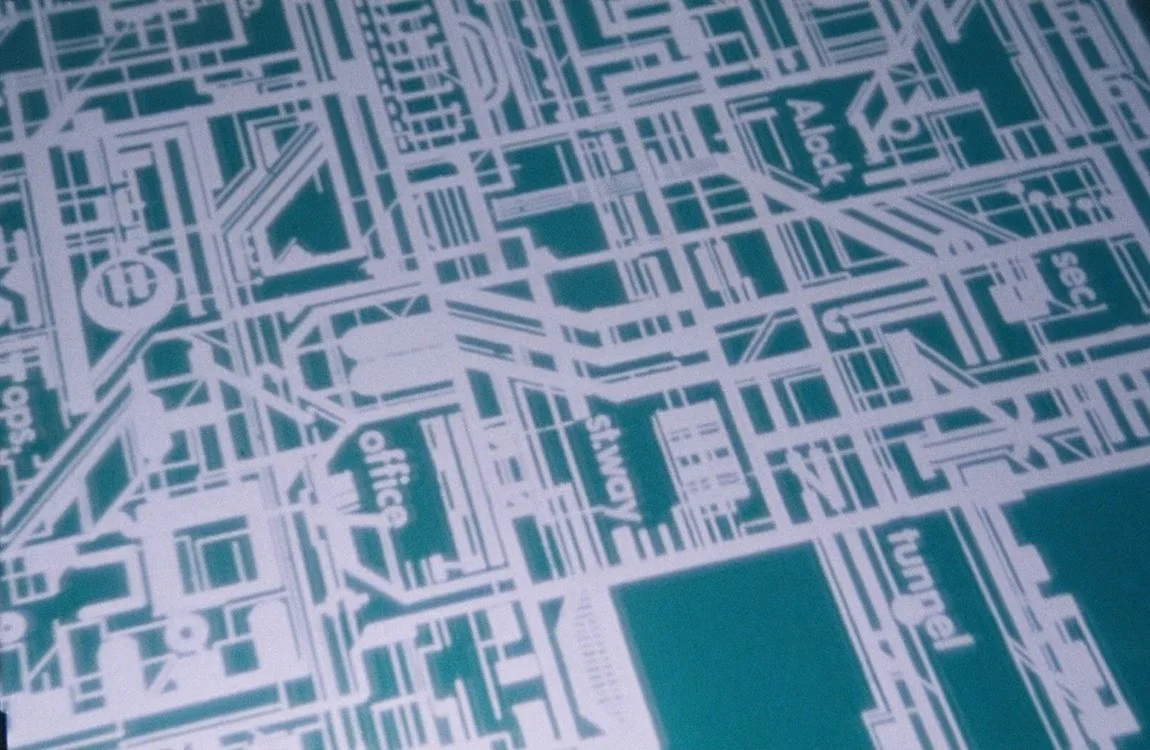
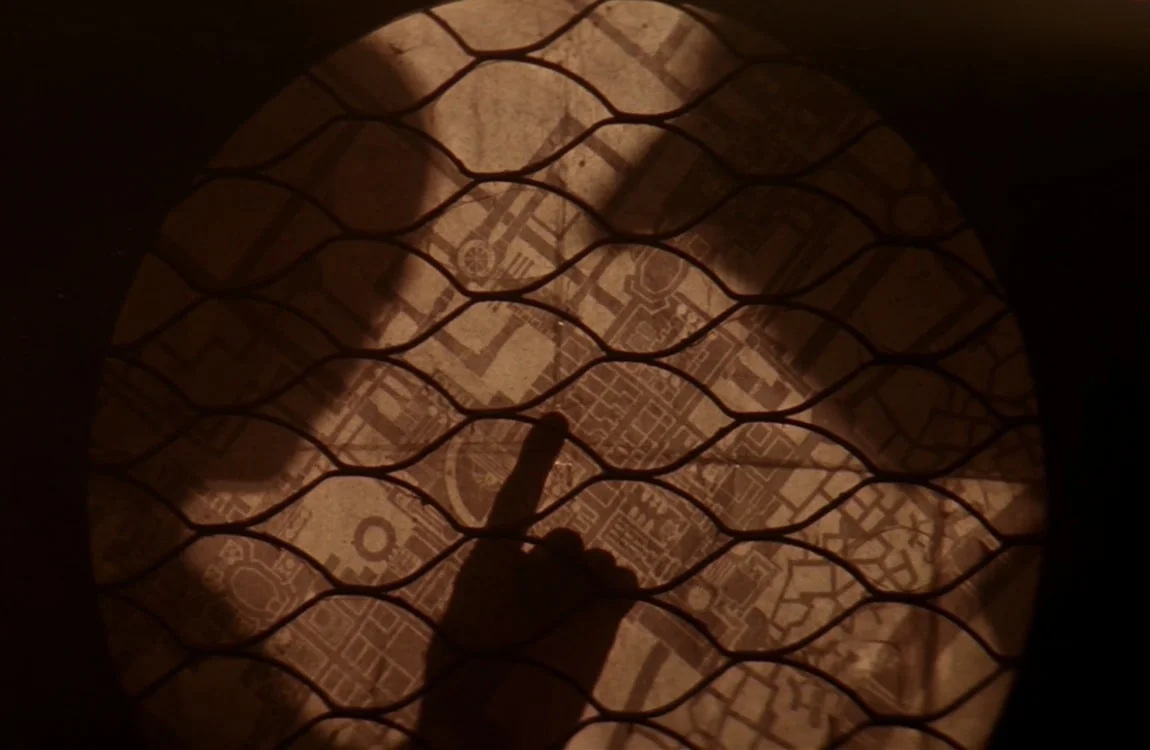
Engineer Facility Map

Once inside the Engineer installation, the Prometheus team deployed mapping drones that generated a detailed 3D map of the structure. These drones (nicknamed "pups") scanned corridors, chambers and the massive urn storage rooms containing the black pathogen. The map helped the crew navigate the alien labyrinth, but somehow, the mapmaker and "pup" owner Fifield still got lost. The upper part of the facility was shown to have a giant spiraling ramp, while all the storage rooms (including the Juggernaut ships) were located underground.
Engineer Universe Map

The Juggernaut ship pilot chamber contained a large holographic map, coincidentally similar to the holograms in the bridge of the USCSS Prometheus. However, only David the android was able to see and decipher it, by watching a hologram of other Engineers operating the ship's controls. The map seems to depict at least six star systems with hundreds of planets the Engineers have surveyed, or visited. It can be presumed that the Engineer homeworld is near the middle of the star map, in the circular "core".
Maps From Alien: Covenant
The maps shown in Alien: Covenant were similar to the ones seen in Prometheus, displayed on advanced holographic displays or large LED screens. This time, the ship was not an advanced research ship like the USCSS Prometheus, but a colonist transport. However, the timeline had moved forward by about ten years.
Planet 4 Star System Map
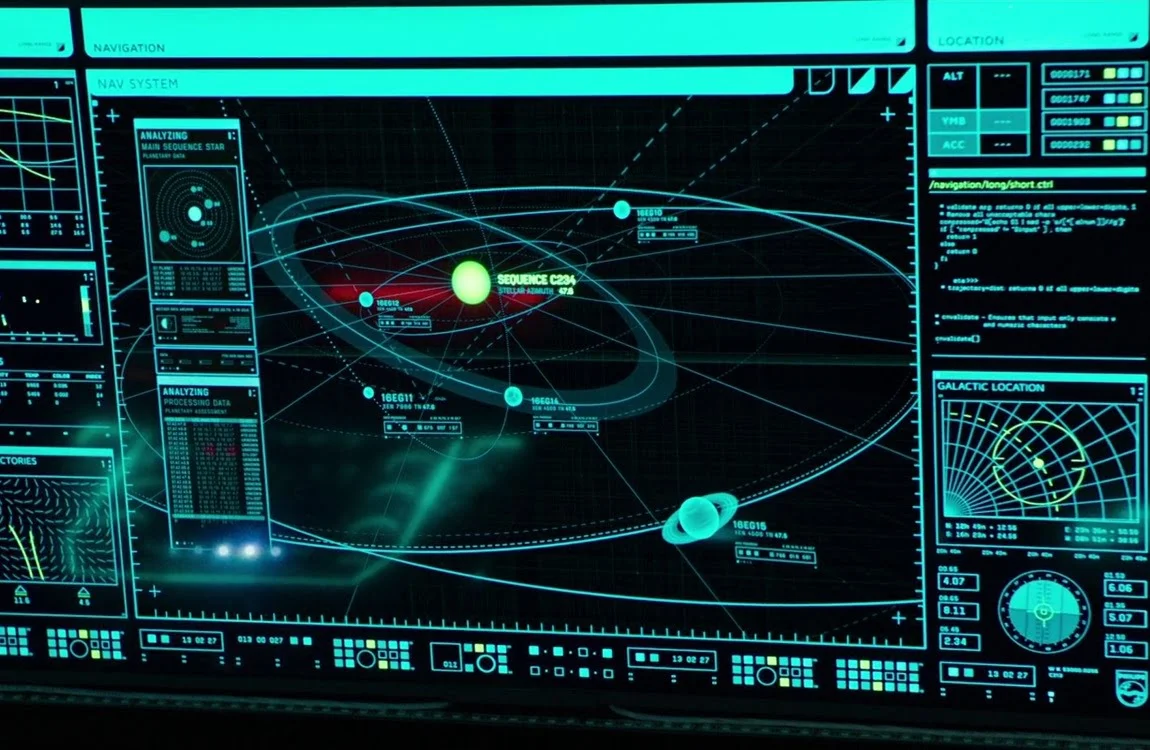
During the USCSS Covenant's voyage to Origae 6 (no maps here), the crew discovered a message sent by Dr. Elizabeth Shaw from a seemingly habitable world later known as Planet 4. Navigation systems displayed its location within a nearby star system that appeared suitable for colonization. This discovery ultimately diverted the mission away from its original destination, ending up on a planet only known as Planet 4.
Planet 4 Surface Map
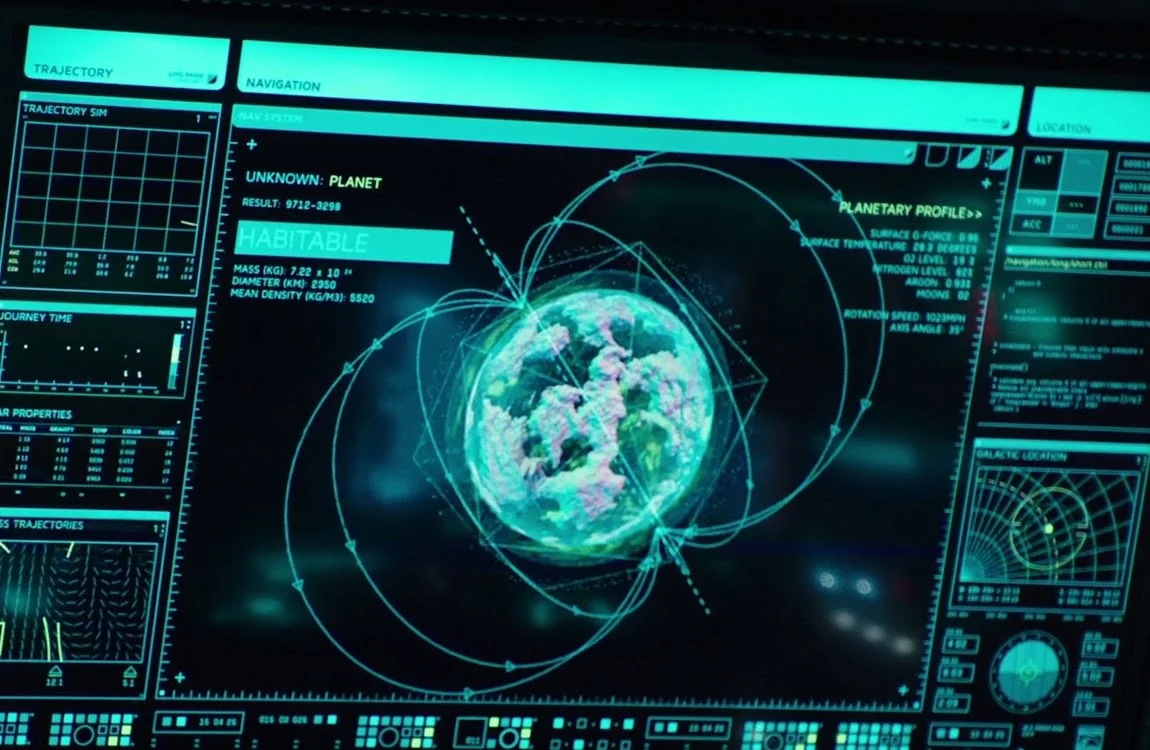
Surface mapping displays analyzed the terrain of Planet 4 before the landing expedition. These scans revealed mountain ranges, river systems and large flat plains suitable for settlement. However, the planet ultimately hid the ruins of the Engineer civilization and David's experiments. The planet was indicated as Habitable, which worked as an incentive to try to explore it.
Planet 4 Storm Map
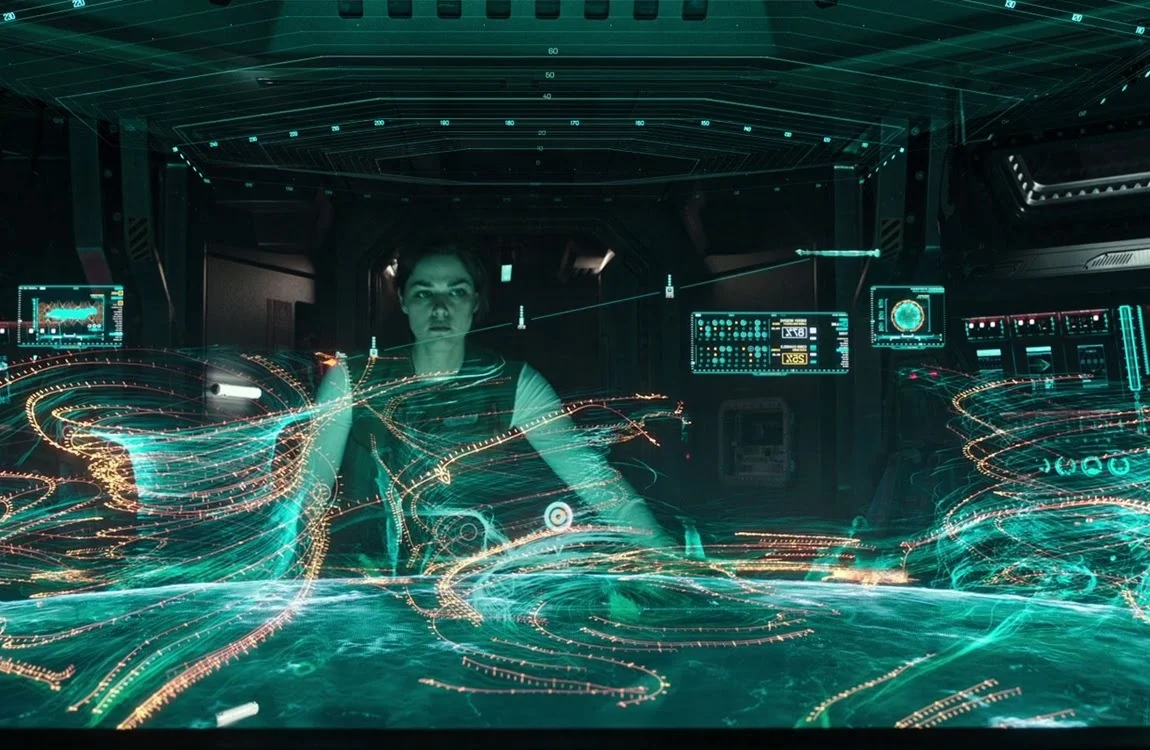
Environmental scans tracked severe atmospheric disturbances across the planet. Storm activity and shifting weather patterns complicated landing operations and made exploration hazardous for the Covenant crew. This storm conveniently made communications with the surface difficult, and hampered surface scans, which could have revealed the Engineer city sooner. A better option might have been to wait out the storm.
USCSS Covenant Map
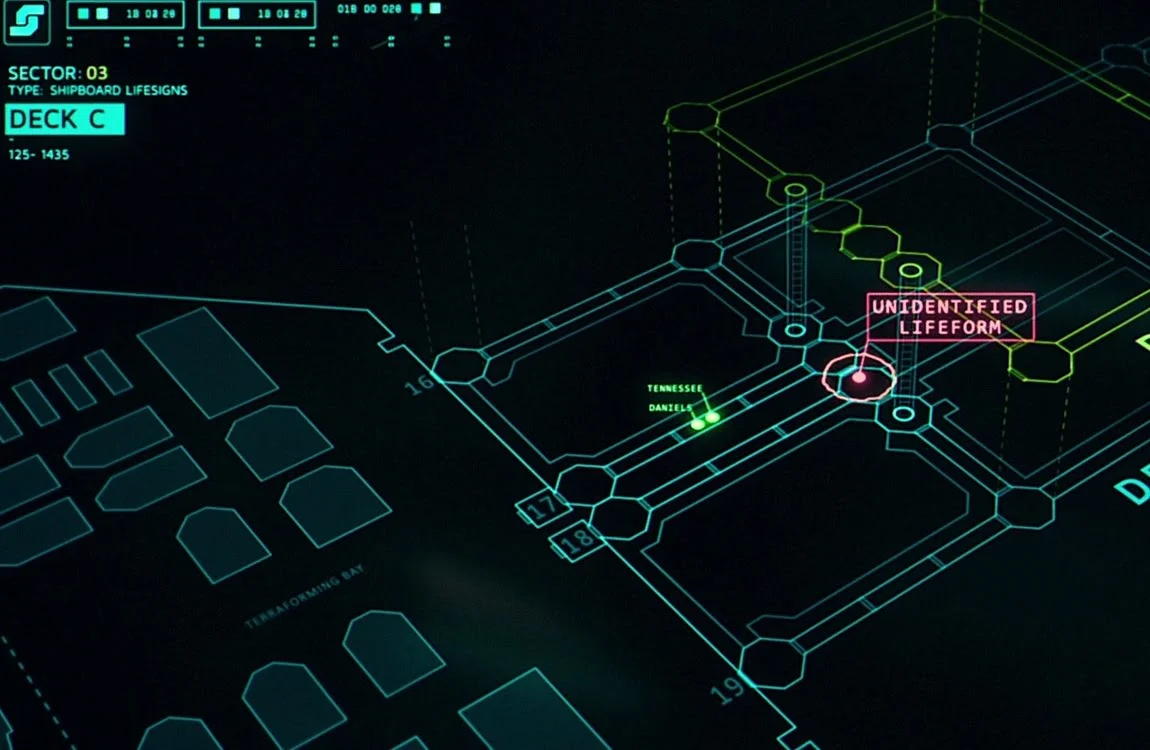
This display showed a schematic map of the USCSS Covenant, highlighting Deck C while the ship's internal monitoring system tracked life signs moving through the corridor network. The interface labeled the system as "Shipboard Lifesigns", and two green markers identified crew members Tennessee and Daniels advancing through the hallway. Ahead of them, a red alert marker labeled "Unidentified Lifeform" indicated the presence of a Protomorph moving through the same section of the ship. The USCSS Covenant was a very long ship, and this showed only a portion of it.
Maps From Alien: Romulus
Alien: Romulus included several brief but informative navigation displays that helped establish where the story takes place within the wider Alien universe. Unlike earlier films that showed large colony schematics or star charts, most of the on-screen graphics in Romulus focused on ship navigation and operational systems.
USCSS Nostromo Wreckage Site Map
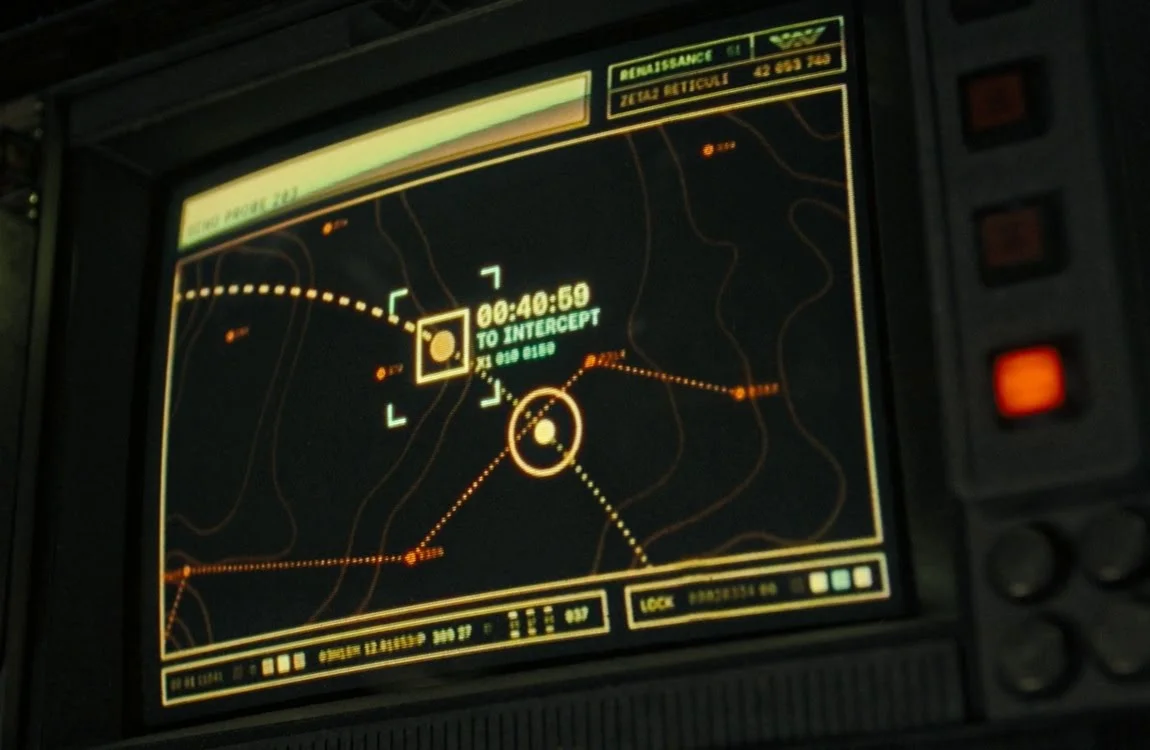
This navigation display showed the location of the wreckage of the USCSS Nostromo drifting in space. The interface labeled the region as part of the Zeta Reticuli system and displayed an intercept course toward the debris field, along with a countdown timer estimating the time required to reach the target. Orbital paths and dotted trajectory lines surrounded the central marker, illustrating the ship's approach route. This wreckage field was where the "Big Chap" Xenomorph from the original Alien was recovered before the events of Alien: Romulus.
Corbelan IV Schematic
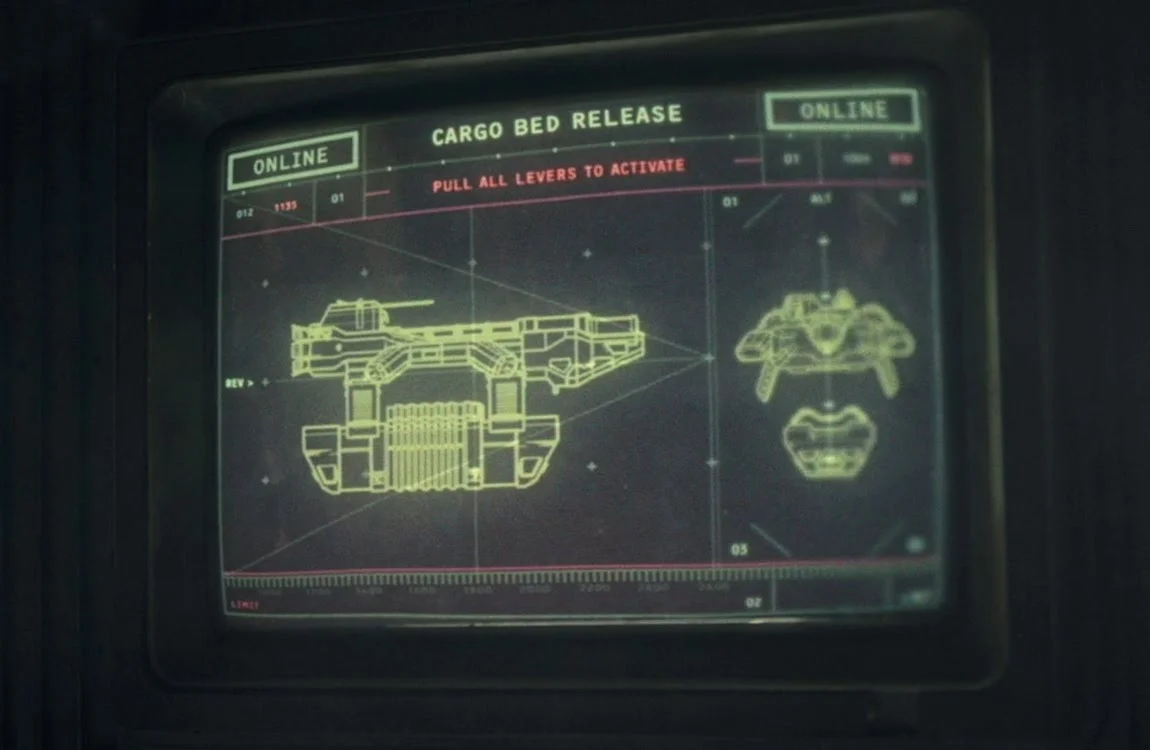
This display showed a technical schematic of the Corbelan IV, the cargo freighter used by the characters during the film. The diagram highlighted the ship's cargo bed release system, with instructions indicating that multiple levers must be pulled simultaneously to activate the mechanism. The cargo bed was released to kill the Offspring creature.
Renaissance Station Section Map

This wall-mounted schematic appeared inside one of the maintenance tunnels aboard the Renaissance Station during the Facehugger outbreak. Tyler studied the diagram while planning a route that would let the survivors bypass the infested section blocking their path through the station. Unlike a full station layout, the map covered only a single module of the complex, identifying the older Remus side rather than the newer Romulus research labs. The labeled corridors and junctions helped clarify how the cramped tunnel network connected different decks, even though most of the station never appeared on screen.
Maps From Alien vs Predator
Although the Alien vs. Predator movies might not be considered canon by Alien purists, they did contain a few maps worth mentioning here. The maps from the first Alien vs. Predator (2004) focus on the hidden pyramid where the main events of the movie took place.
Antarctica Temple Orbit Map
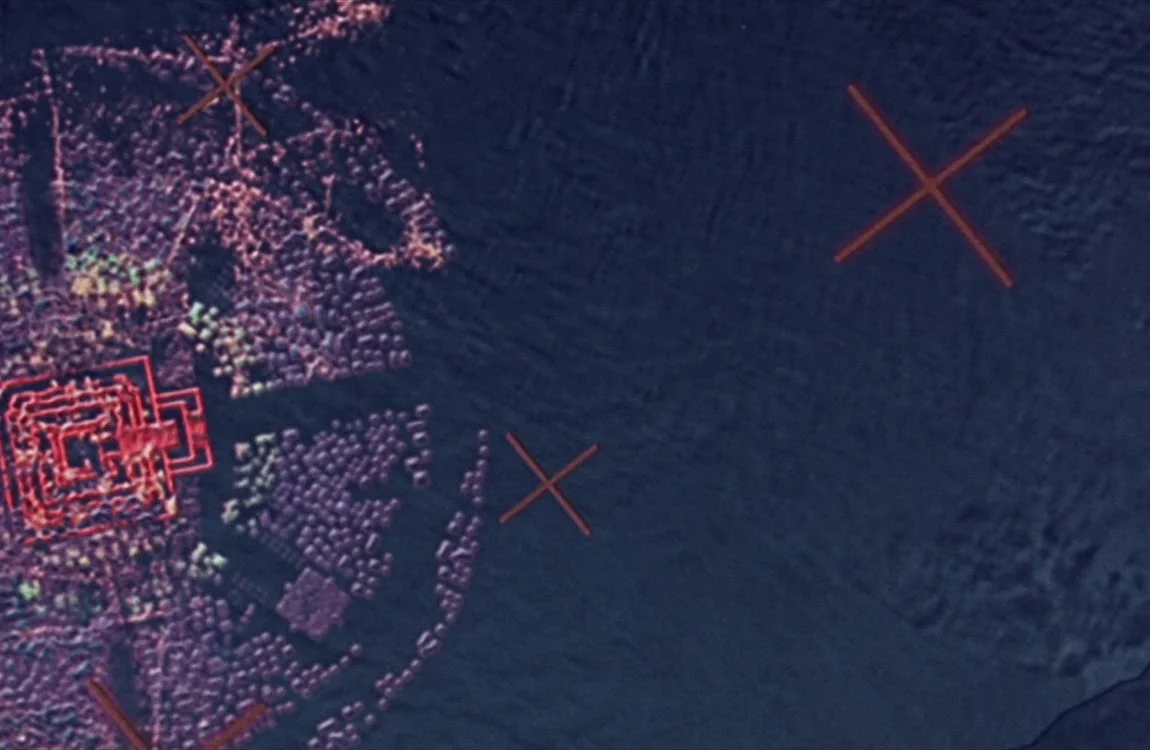
A Weyland Industries satellite detected a mysterious heat signature beneath the Antarctic ice. Orbital scans displayed the location of the buried pyramid temple used for Young Blood Predator initiation hunts. This map guided the Weyland expedition to the Bouvetoya island, specifically to the Razorback Point Whaling Station. The orbital picture seems to indicate there might have been more structures around the pyramid (shown in purple), perhaps buried deeper.
Antarctica Temple Holographic Map
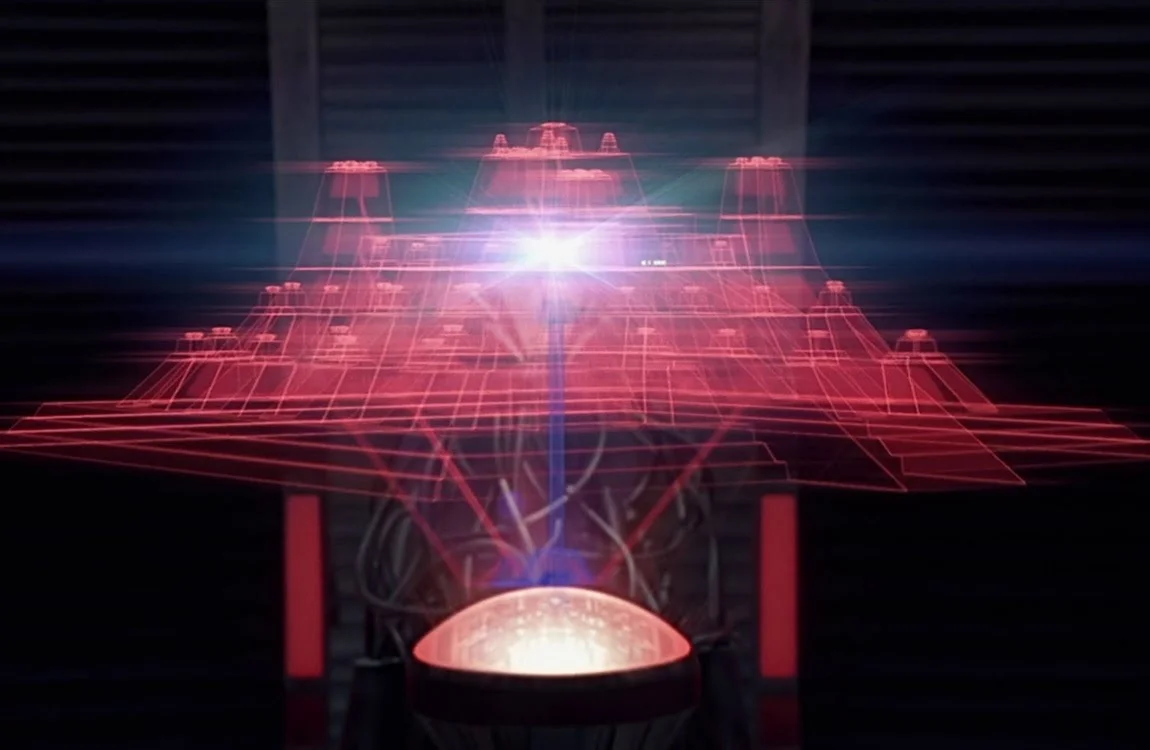
The Predators had more advanced displays than humans, and were able to produce a 3D holographic display of the entire temple. These displays revealed the pyramid's internal chambers and shifting corridors used during the hunting ritual. A notable area on the map is the blue Queen's chamber, which is much deeper than the rest of the pyramid, and connected with four tunnels.
Maps From Aliens vs. Predator Requiem
Anything in Aliens vs. Predator: Requiem was hard to make out, due to an issue with brightness levels and a severe case of darkness. However, a few somewhat interesting maps were displayed in the movie, both from the perspective of humans and Predators.
Predator Universe Map
Predator navigation systems displayed complex galactic maps that connected various hunting worlds and star systems. These holographic projections hinted at the enormous reach of the Predator civilization across the galaxy. However, Wolf Predator was able to navigate his ship from Yautja Prime to Earth in mere hours, possibly using wormhole technology, also seen in The Predator (2018).
Gunnison Nuke Map

This tactical display showed an overhead map of Gunnison, Colorado with a nuclear strike overlay applied to the city grid. A dark red, hatched core marked the primary impact zone representing pressure damage, surrounded by a yellow band indicating the wider heat damage radius, while a pale blue outer contour traced the debris damage zone. On the right side, labeled callouts connected each damage category to its corresponding ring on the map. Along the bottom, the interface identified the weapon as an MK83 nuclear weapon with a yield of 200 kilotons. In comparison, the bomb dropped on Hiroshima was about 15 kilotons.
Maps From Alien: Earth
The Alien: Earth TV series introduced a world where massive corporations held territorial control over large regions of the planet. Because this portrayal did not align cleanly with earlier canon, it has been suggested that the series exists in its own timeline.
Mega-Corporation World Map
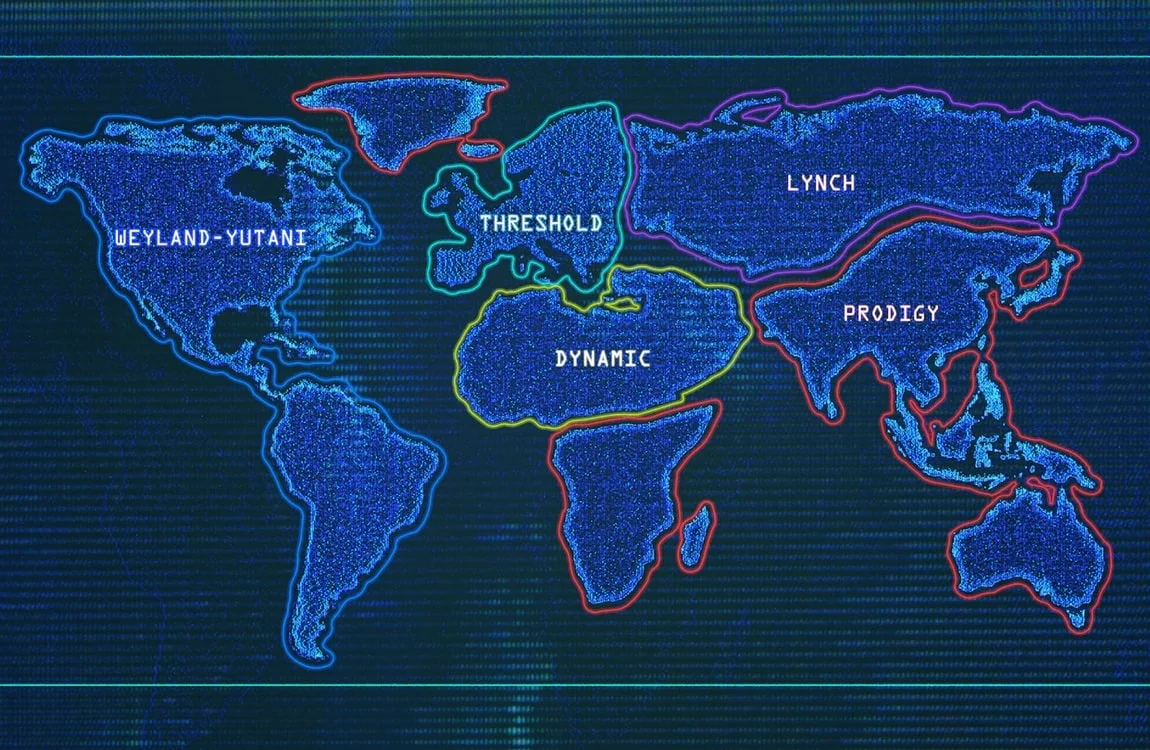
The corporate territory map from Alien: Earth depicted a divided version of Earth controlled by five powerful megacorporations known as "The Five": Weyland-Yutani, Lynch, Prodigy, Threshold, and Dynamic. The planet appeared partitioned into vast corporate spheres of influence that stretched across continents and oceans. Weyland-Yutani dominated most of the Americas (surprisingly not controlling the UK and Japan), while Lynch controlled large portions of Europe and northern Asia. Prodigy governed much of Asia and the Pacific region, along with several strategically isolated territories such as Greenland and Iceland. Dynamic occupied Africa and parts of the surrounding regions, while Threshold maintained a smaller but central territory bridging Europe and Asia.
Final Thoughts
Although the Alien films are best known for their creatures and suspense, the background screens and schematics quietly reveal a surprising amount about the universe they take place in. Navigation charts show where ships travel in deep space, colony floor plans hint at how distant settlements function, and holographic displays reveal traces of ancient civilizations far older than humanity. Many of these maps only appear on screen for a few seconds, often in the background of a scene. Taken together, however, they help piece together the larger geography of the Alien universe. For even more detailed Alien Universe diagrams, maps, and charts, be sure to check out the Alien: The Blueprints book by Graham Langridge.
Sources
Movies
- Alien (1979)
- Aliens (1986)
- Alien 3 (1992)
- Prometheus (2012)
- Alien: Covenant (2017)
- Alien: Romulus (2024)
- Alien vs. Predator (2004)
- Aliens vs. Predator: Requiem (2007)
- Alien: Earth (TV series) (2025)
Books
- Alien: The Blueprints (2019)
Tag Categories: Alien Lore